This blog is automatically generated by AI-DBA without human revision, please note that errors may occur.
As businesses grow and evolve, the need to move databases between on-premise SQL Server instances becomes essential. This process can be streamlined with the help of AI-DBA's database move feature. In this blog post, we will explore how to move a database using either the Data Gateway staging or Azure Blob storage options. We will provide an overview of the process, discuss prerequisites, and provide step-by-step guidance. The database move feature in AI-DBA simplifies the process of moving databases between on-premise SQL Server instances. It offers two options for staging the database during the move: Data Gateway staging and Azure Blob storage. The Data Gateway staging option allows you to use a local staging folder on the source server, while the Azure Blob storage option utilizes Azure Blob storage as the staging location.
Moving databases between on-premise SQL Server instances can be a complex task, but AI-DBA simplifies this process with its intuitive database move feature. By following the step-by-step guidance provided in this blog post, you can seamlessly move databases using either Data Gateway staging or Azure Blob storage. With AI-DBA, database administrators can save time and effort while ensuring the smooth transfer of critical data.
To move a database to another SQL Server instance through the AI-DBA portal, the following privileges are required.
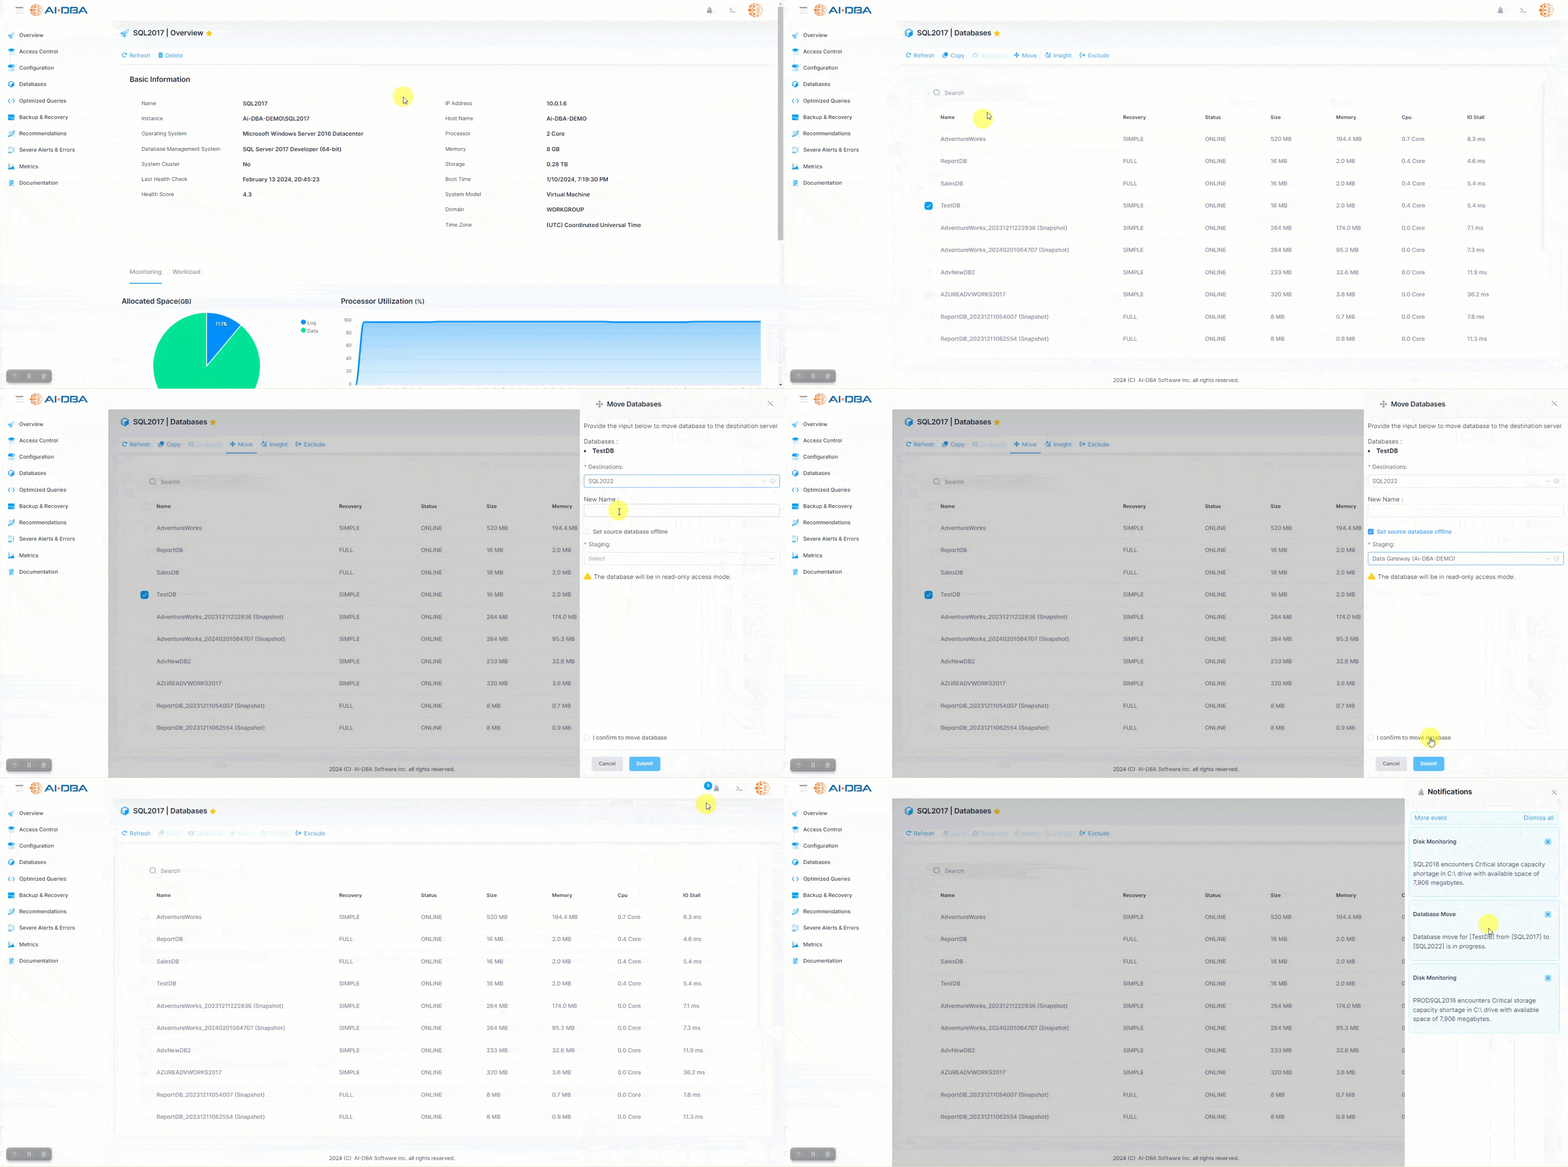
Moving a database through the AI-DBA portal is a user-friendly process. Here is a step-by-step guide to help you through the process:
By following these steps, you can seamlessly move a database using the AI-DBA portal. The intuitive interface and real-time progress updates make the process efficient and user-friendly. Enjoy the ease and convenience of AI-DBA's database move feature for your data management needs.
